❖ Version History ❖
October 1st- November 1st, 2025
Behind the scenes of everything else that has been going on from the beginning of this RenFaire season to right now, there has been a logic problem lurking in the back of my mind…
What are we gonna do about the component tray design for Royal Threadcount?
If you can remember all the way back to Episode #11 of this Design Journal (click here if not), we had an ambitious dream at one point to have the parts tray be a literal building of five separate little trays in the shape of a Pagoda.
I still very much want to make this concept a reality..
but is it practical?
is it what the people want?
Being at the Renaissance Faire this season reminded me of something really important about the Phoenix Farm component tray that made it sell as aggressively as it did: It. Fits. In. The. Box.
We hear that exact question about twelve times a day: “Does it fit in the box”? Because, let’s be honest, if it didn’t, it wouldn’t be anywhere near as attractive as it is. And this is really important!
The real question on the table is:
Can the pagoda still exist somehow AND fit inside the box when it is assembled?
… only one way to find out.
Time for an unfortunate amount of math…
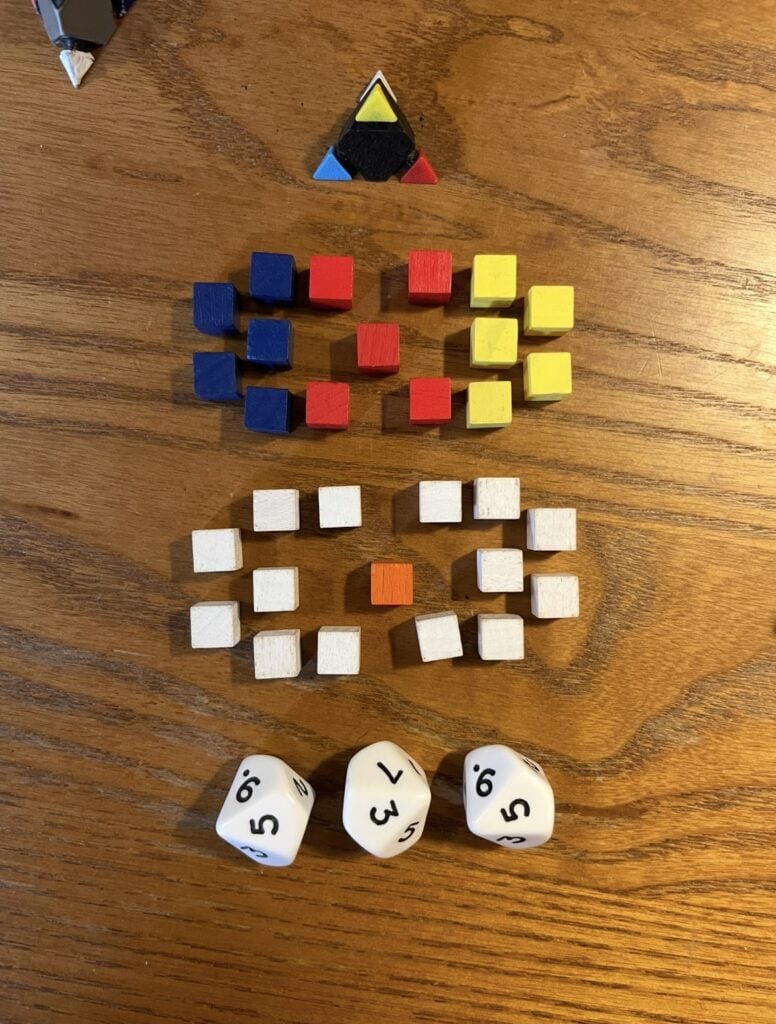
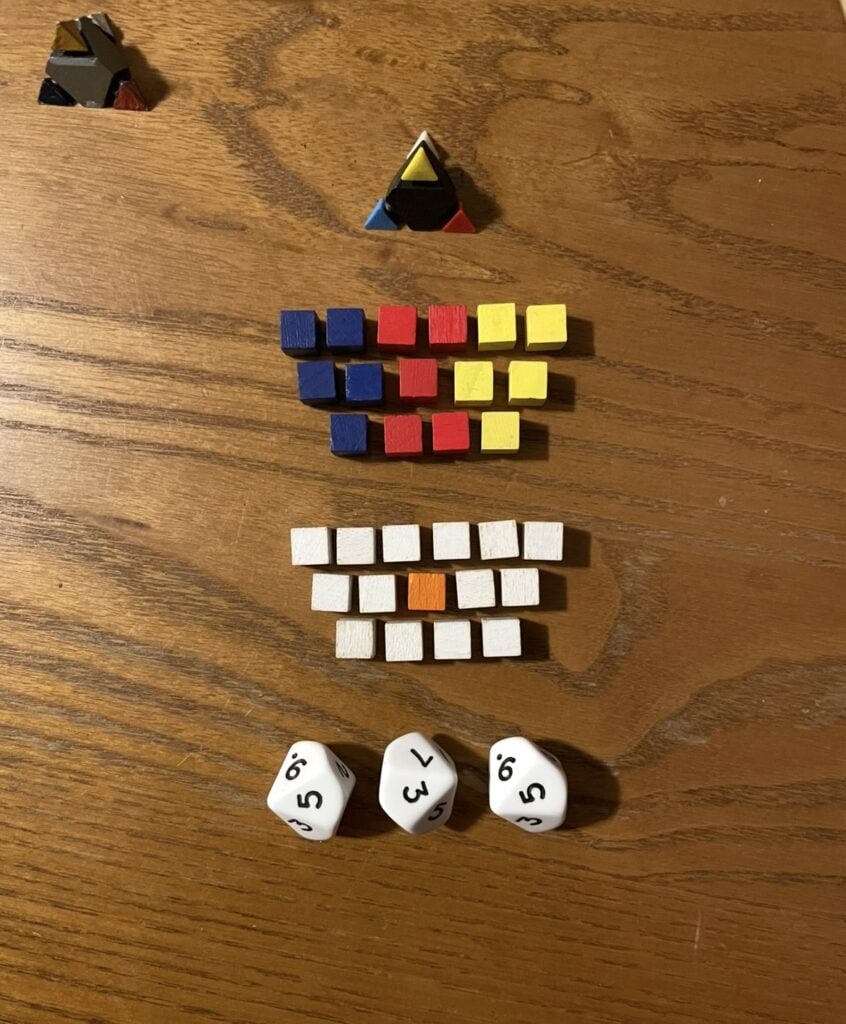
The first (and most tricky) thing to figure out here are the exact dimensions of each and every piece being utilized in the game. We need to know the millimeter measurements of the width, height, and depth of all these 3d objects so that we can start building the nest for them the right way… But more than that, we also need to really seriously consider their configuration within the container that we are about to build.
A huge aspect to why this hasn’t been done sooner was actually mostly due to the unknown elements of how many players we were going to have in the game, and how much we were going to try and reduce the number of parts in the game. Now that we have a finalized prototype kit, it is a lot easier to consider these questions. So what are we working with here?
•3 D10’s
•30 wooden cubes in 5 different colors
•1 custom shaped d4
Not too bad… but also, we want to give logical reasons to how they will be separated in the tray. This gets me to do my typical procedure as shown in the photos above of: dump all the bits on the table & visually figure it out.
I really liked the idea of having the cubes separated by: silk & sun vs. dye. That made the most sense to me & looked nice when arranged on the table, but I had an interesting issue I had to keep in mind: If I was going to end up having all of the d10 on the same floor, then we need to have the cubes laid out at least 6 wide on their floors of the tray to keep the width large enough to house the dice in the base. (also had to be cross-referenced with the measurements of the box width… and though it was a bit close, it would work).
At first I liked the second concept shown above, but I kept coming back to the first idea on the left in the photos due to the symmetry. It involved a little bit more dead space than I liked, but it was far more aesthetically pleasing. So, of course, now it is time to hop back into blender!
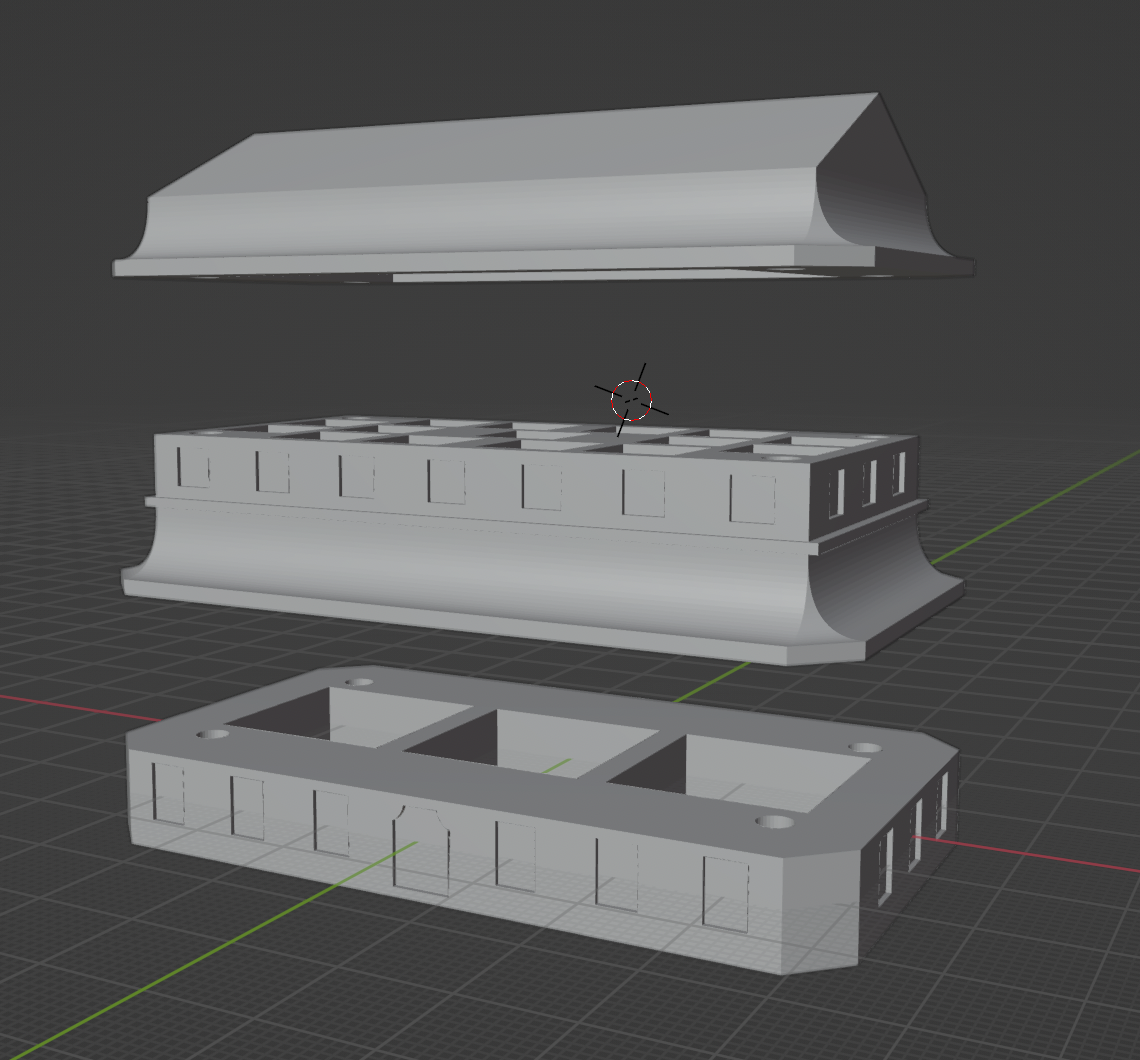
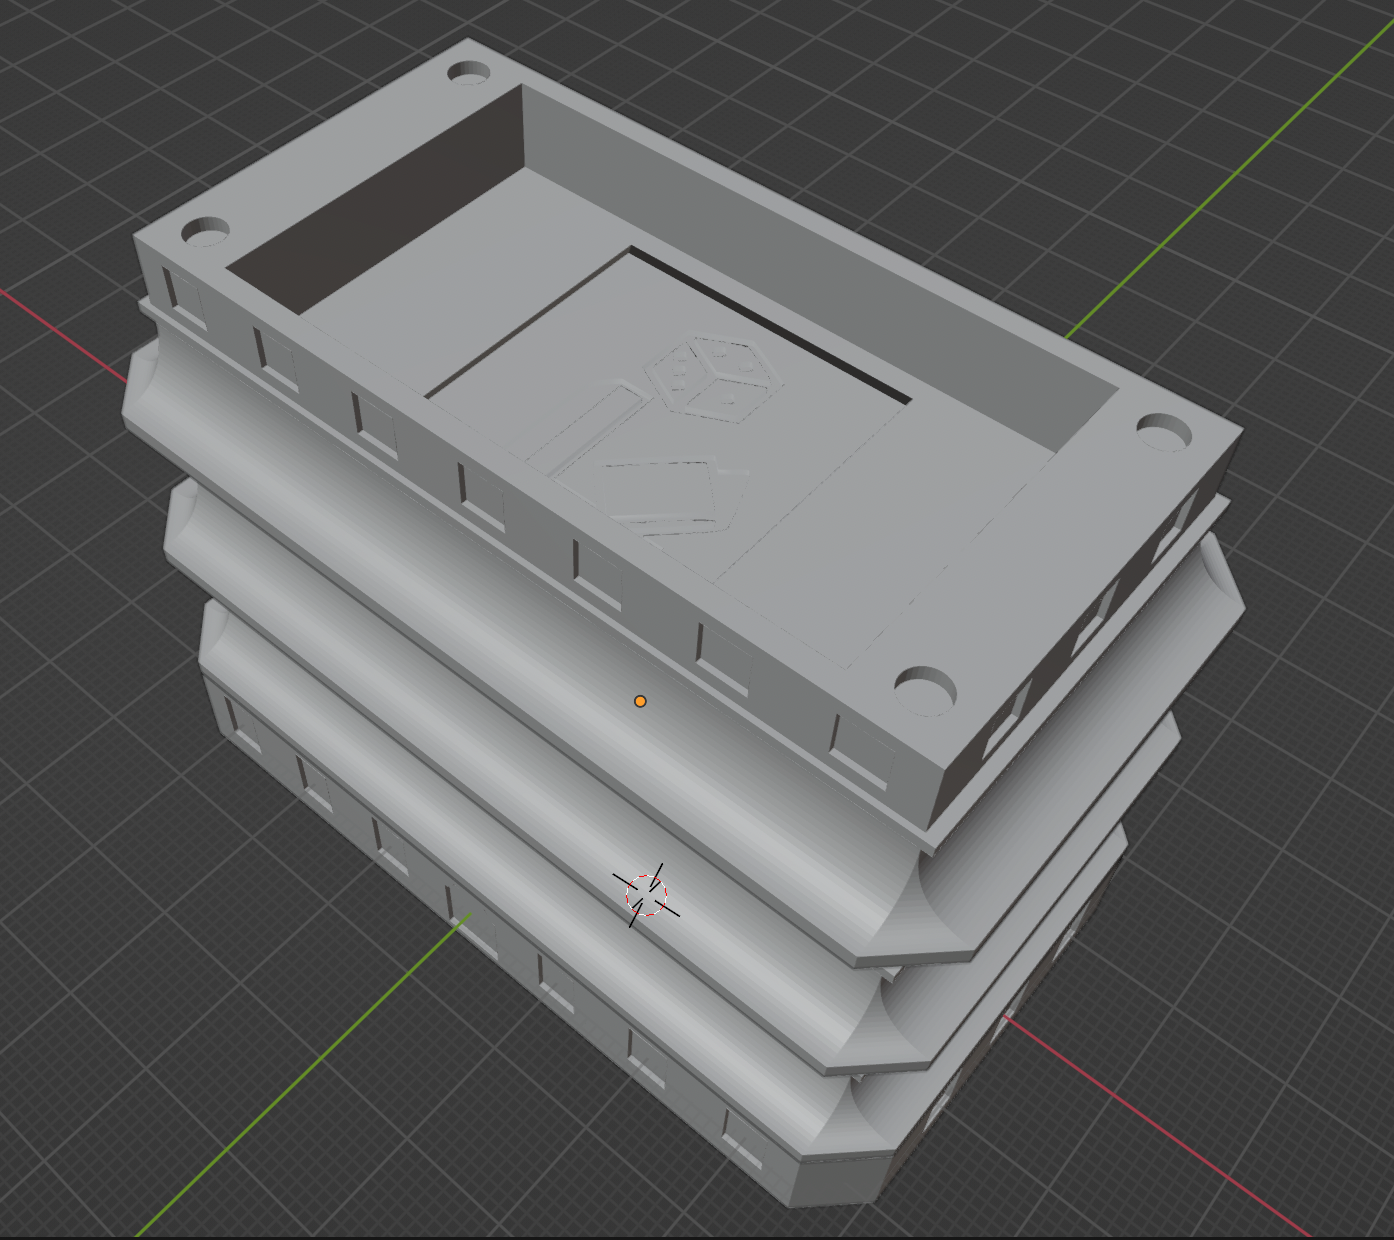
The modeling process is… very tedious. It requires perfect math, and a lot of patience. But, once you start getting the number right, it becomes a lot more forgiving. The only real pain in the butt is applying all of the bajillion Boolean modifiers & cleaning up the geometry on the other side. (for frame of reference, blender loves to give me shit for my usage of booleans when trying to 3d print my non-manifold edges).
It takes a few days to get all the details I want to include into this model, but I really love how it turned out, especially getting to sneakily add the logo into the top floor the way that it is hidden in there!
As you can see in the featured image at the top of this post, the model printed rather nicely… but that print was simply what I like to call the “Ghost Test”, which means that the model is printed correctly in shape, but is now about to be color coded to see if it can still hold down the design.
This leads me to my next interesting issue to face: including a new type of PLA in my fancy-pants BambuLab printer: Wood PLA. I had been reading up on Wood PLA way back in the spring, and I was absolutely obsessed with the idea of trying it out, and what better project to implement it in than this! ~ But I was also a bit nervous, because fancy PLA is not necessarily healthy for printer technology/hardware. I did a lot of research, tried several things, but after a few tests I finally got to a model that I absolutely loved:
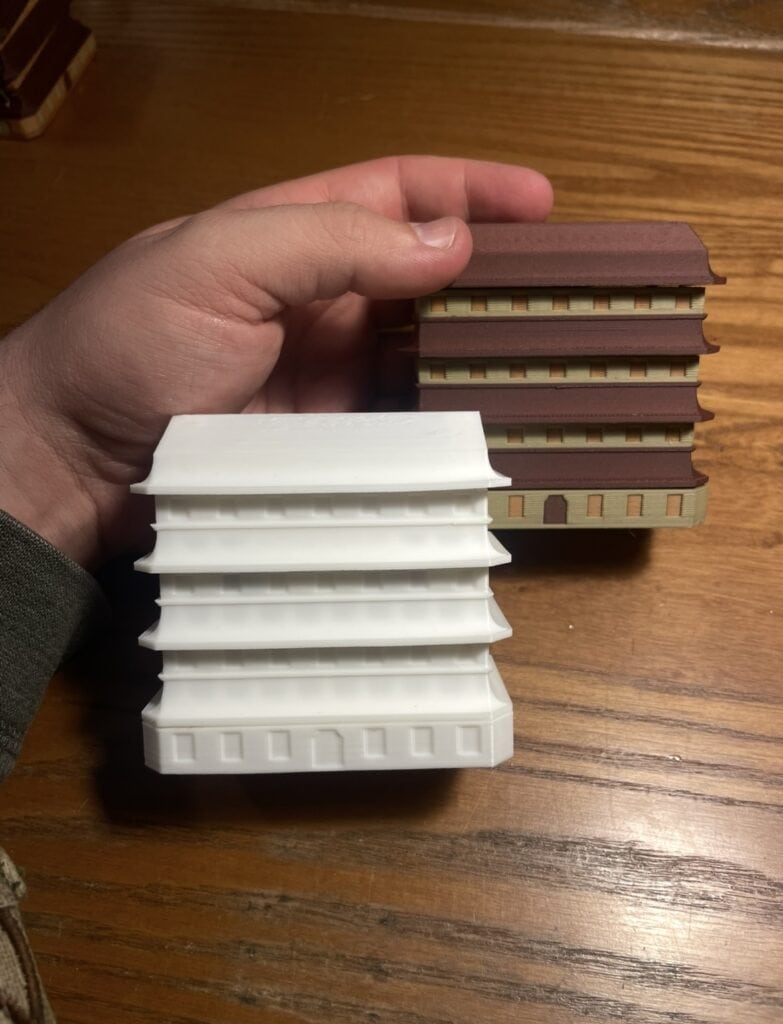
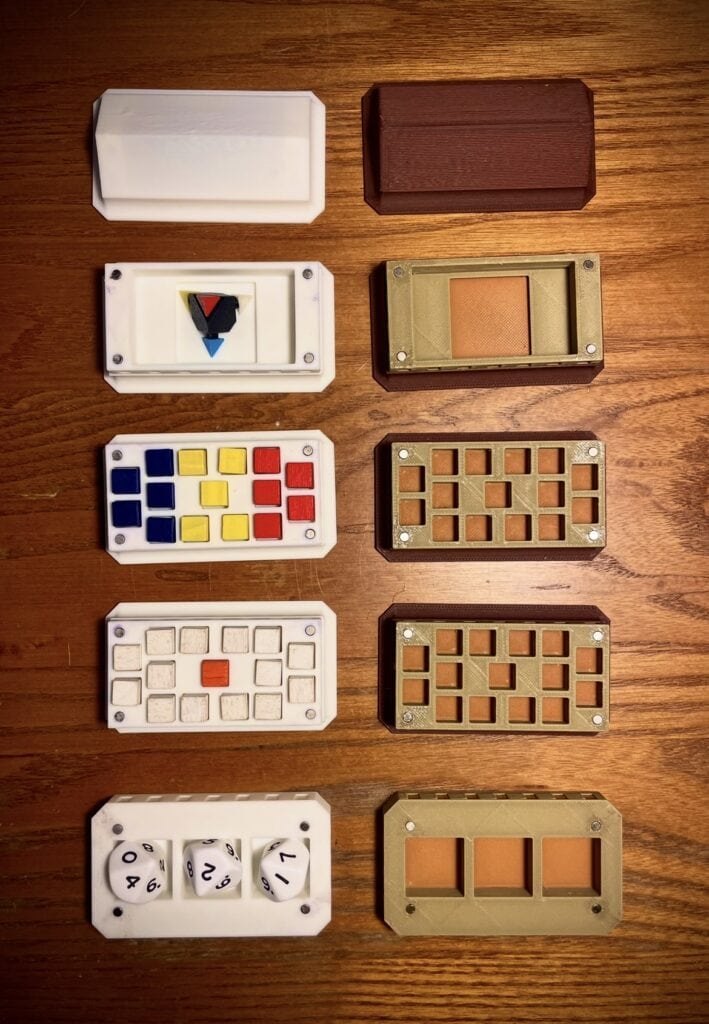
I was in disbelief when the first model came out of the printer. It was way wayyyyy prettier in color than it was in just white. I am so happy with the design!
Of course, there are a variety of new & interesting issues I need to work through in the mastering of this design… we have some interesting challenges to overcome here with needs for scaffolding, refining of color usage for print time & minimal waste, and of course, structural issues with the model itself, but all of these are pretty easily solved, just requiring some dedication.
the most interesting of my problems was probably the scaffolding. This tray has hollow parts on the top & bottom of every piece except the base. The top hollow parts are pretty easy to navigate. The bottom hollow parts bring a lot of risk to the print. Without the scaffolding the ceilings sag and the pieces no longer fit within the model. This is… super unacceptable. We need to not be worrying about if the print is going to have this issue or not.. so of course we build scaffolds… but also of course, this brings in a whole additional step to the making of this kit:
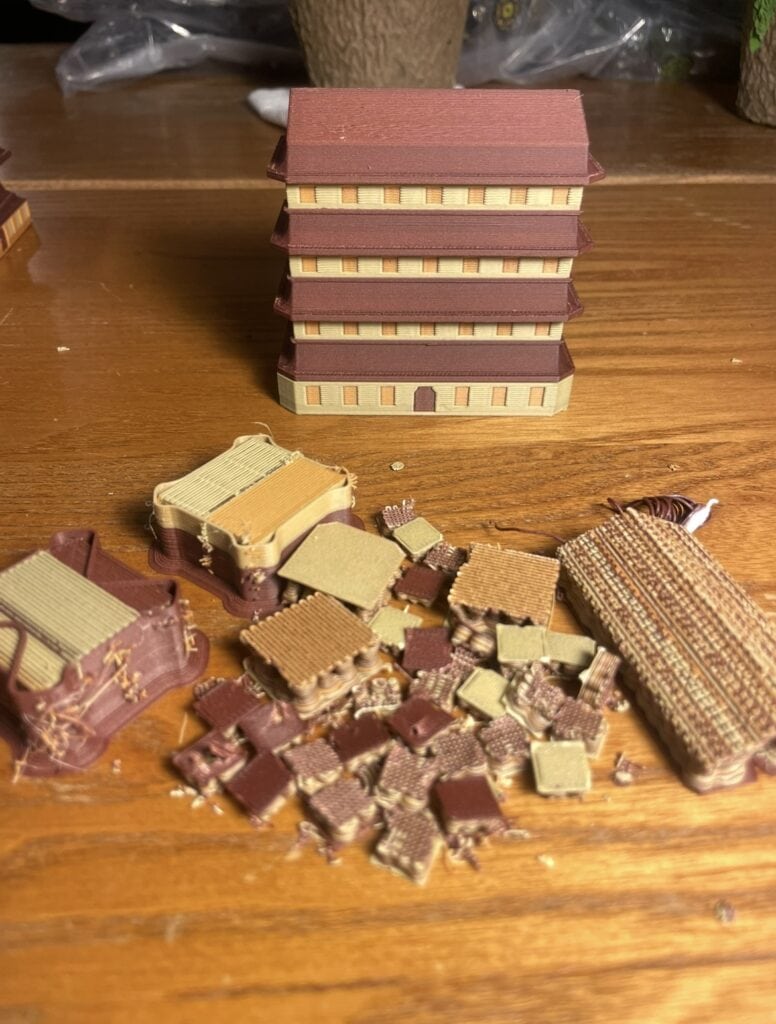
It takes a little bit more work, and the kit requires an astounding 32 magnets to hold it all together, but the model is amazing AND IT FITS INSIDE THE BOX!!!
In my mind. Mission Accomplished. Quest Complete. Just gotta make 200 more of these suckers & buy an iron mine of tiny neodymium magnets!
Unfortunately, due to the work & material costs, I think this sucker is gonna run for about $20… but I think it is absolutely worth that price every single time I pick it up. ~especially when compared to the $10 Phoenix Farm tray!
Now we get to return to the final piece of one of our other accessory quests: The Fabric Bags! Be sure to check back in for another amazing Librarium Games adventure in the Design Journal soon! And as always, thank you for reading!